Karanji or Gujiya is a Diwali delicacy that is loved by many in India. Layered Karanji, also known as Khajyachi Karanji or Satyachi Karanji in Marathi, is an even finer version of normal Karanji, in which the outer cover of Karanji has many layers which not just melt in the mouth but also look great.

Jump to:
This seemingly complex-looking Diwali sweet is in fact incredibly easy to follow. Check out this quick, step-by-step video that will guide you through each and every process of making Layered Gujiya.
Quick video of Layered Karanji:
Not just during Diwali, in some parts of India, Gujiya are enjoyed during Holi and Narali Purnima as well. Karanji can have various types of filling and it can be sweet as well as savoury. It can be made of dried coconut, fresh coconut, mawa, green peas, etc. The Karanji discussed in this blog post will have desiccated coconut filling which is typically prepared during Diwali.
Preparing the Dough
Every step in preparing layered Karanji is important, it will determine how it looks and tastes in the end. Using hot ghee (clarified butter), known as mohan in Marathi, when preparing dough is crucial as it will make the cover crunchy as well as prevent it from soaking up a lot of oil while frying.

Knead the dough, only using little milk at a time, to medium consistency, so that it rolls and spreads easily. Also, let the dough rest for an hour so that semolina can absorb the moisture and get well integrated with the flour.
Ghee cornflour mix
Now to get layers on the cover of Karanji, we need to roll 3 rotis and place them on top of each other. But each of this roti must stay separate and not stick to each other while rolling puris for Karanji or else we won’t get the layers, so to achieve this we need to prepare a mixture of ghee (clarified butter) and cornflour.

Ghee must be beaten well till it loses its grainy texture. Cornflour must then be added and mixed till it becomes creamy. This mixture must then be applied on top of each of the rotis so that when Karanji is prepared and fried, the ghee will melt in hot oil and separate each layer out.
Creating the layers
As mentioned above, 3 rotis should be prepared and separated with ghee cornflour mix. But this is not enough if you need proper layers. The way you press and roll puri is also important.

To make puri, take a piece of cut dough and place it on rolling board in such a way that the layers are on the sides. Then gently press from top in a slanting manner so that you can see layers at the bottom as shown in the video. After this gently start rolling a puri.
You can use some plain flour if your puri sticks to the rolling board. Many are against this as this extra flour might later on settle in the oil while frying and prefer to use oil to help with rolling, but to be frank, using oil when you are making puris for normal Karanji’s is fine, but when you are making layered Karanji, it becomes really tricky. The ghee cornflour mix in between the layers is very sticky and keeps sticking to the board and applying oil makes it even harder to roll puris; instead using plain flour makes the job easier.
Now there are many different ways for rolling puris for layered Karanji. One method is to cut the three combined chapati roll vertically into half and then into smaller pieces and then make puris and other method is to create a rose shape by pressing the sides of piece of cut dough and then pressing flat and placing the rose side down before rolling a puri, but although these methods result in more layers, they are more prone to Karanjis splitting up and all filling coming out during frying. Hence, in my video I have shown and actually do prefer slanting method of preparing puris.
Filling the Karanji’s
Make sure you stuff karanji well with filling and when you seal sides make sure you have removed all the trapped air from within or else after frying, karanji will blow up like a balloon with very little filling which will leave from sides and rattle.

Also, make sure to seal the sides properly or else the filling will come out whilst frying. This will mean extra work for you, as you will need to wait till oil cools down and then strain it and then fry rest of the Karanjis. If you keep frying after filling has come out without straining, then filling will burn and stick to rest of the Karanjis making them look unpleasant.
"Frying – act of patience that will reward you in the end"
Make a few karanjis at a time and keep them covered till you are ready for frying. Fry only after oil is hot. Only fry few karanjis at a time and always use low heat setting. You need to be very gentle and have lots of patience whilst frying as karanji will be very delicate. As you will be only frying few at a time and using low heat, frying will take time; but this low heat is what will give karanji its multiple layers which will look beautiful, just like a piece of art, after they are ready.
If any of the karanjis open up while frying, as mentioned above, strain oil after it cools down and then continue to fry rest of the karanjis.

Let all the Karanjis cool down completely before storing in an air-tight container. They should stay fine and good to eat for about a week.
If you are a new cook or have never done Karanjis before and don’t feel confident enough to make layered Karanji’s, try making normal Karanjis without layers first. After you have mastered those, you can move ahead and try making layered Karanjis.
Check out the Recipe Card and Step-by-Step Instructions with Photos below.

Here are other OvalShelf’s Festive and Desserts / Sweets recipes.
Some OvalShelf’s quick and easy recipes that you will really love are:
Check out OvalShelf’s collection of Veg recipes.
Some trending OvalShelf recipes:
Recipe Card for Layered Karanji / Gujiya
Latest OvalShelf recipes:
Step-by-step instructions with photos for:
• Mix plain flour (Maida), salt, fine semolina (Rava/Suji) in a bowl and add hot clarified butter and mix well.

• Using little milk at a time knead a medium consistency dough.

• Cover and let it rest for an hour.

• Heat pan on low setting, roast poppy seeds (Khus Khus), keep them aside and let them cool down.

• Then roast dessicated coconut and let it cool down.

• Now grind cooled poppy seeds (Khus Khus).

• Add powdered sugar, roasted ground poppy seeds, green cardamom (Elaichi) powder, chopped almonds (Badam), chopped cashew nuts (Kaju) and raisins/sultanas to roasted desiccated coconut and mix well.

• Take clarified butter (Ghee) in a bowl and beat well till it loses its grainy texture and becomes smooth.

• Add cornflour and again beat well till it becomes creamy.

• After dough has rested for an hour make 6 large balls.

• Roll 3 slightly thick chapatis from 3 dough balls.

• Apply clarified butter (Ghee) and cornflour mixture to one chapati and sprinkle some plain flour (Maida).

• Place second chapati over it and follow the same process for second and third chapati.

• Then roll all 3 chapatis together.

• Stretch the roll slightly so that it has even width throughout.

• Cut roll into 10 equal parts. Cut into more parts if you want smaller Karanjis. Keep these aside and cover so that they don’t dry out. Follow the same process for remaining 3 dough balls.

• Take one part and place it on rolling board so that layers are on the side. Press gently from top in a slanting manner.

• After pressing in slanting manner you should see layers on the bottom.

• Then gently roll a puri.

• Place some coconut sugar mixture on top.

• Apply milk on puri's circumference.

• Fold and seal the sides properly so that filling doesn’t come out while frying. Before sealing make sure there is no trapped air inside.

• With a pastry wheel remove excess sides. Keep aside and cover so that it doesn’t dry out. Shape rest of the karanjis in this manner.

• Heat oil in a pan on low setting and fry only a few Karanjis at a time.

• Gently flip them over while frying as they will be delicate.

• After they are golden all over, remove and drain all the oil from their layers.

• Then place them on a kitchen roll.

• Fry all Karanjis in this manner. If any Karanjis open up while frying and filling comes out, cool and strain the oil and then fry rest of the Karanjis.

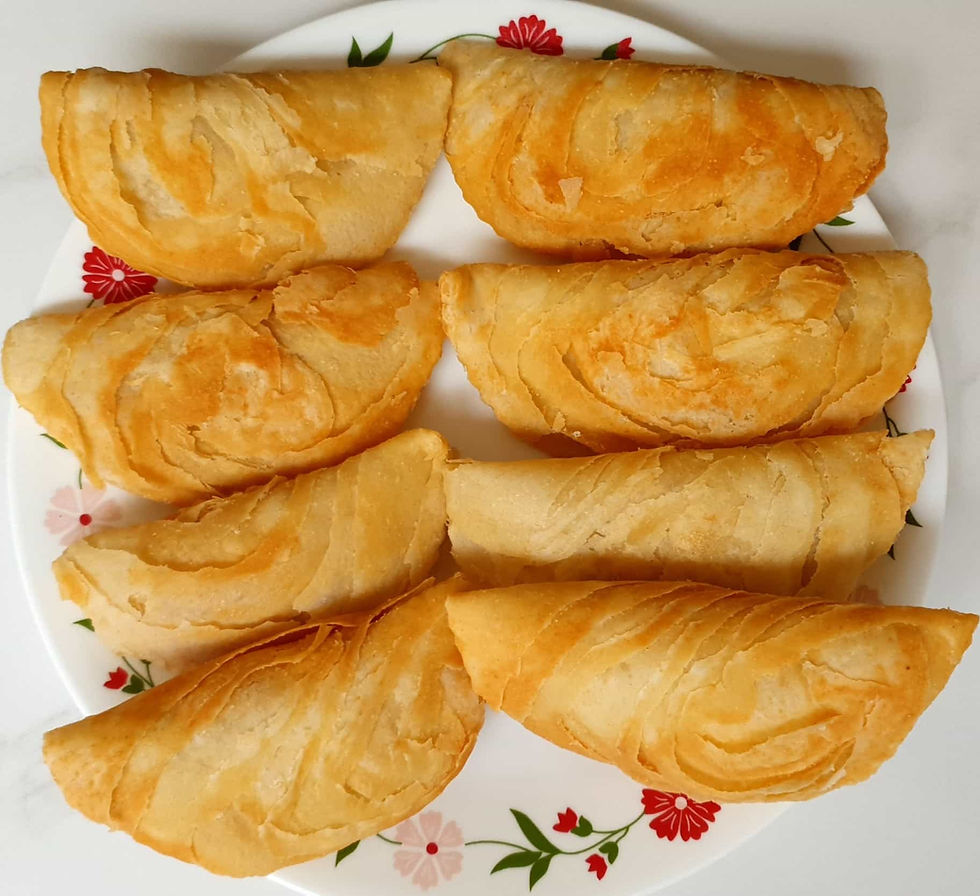
• Let Karanjis cool down completely.

• Serve or store them in an air-tight container after they have cooled down completely. Delicious Layered Karanjis are ready. Enjoy!

♥ We LOVE hearing from you ♥
If you have tried this recipe, please do share your food photo with us. Mention @ovalshelf or use hashtag #ovalshelf on Facebook, Instagram or Twitter. Thank you.
Subscribe to our YouTube Channel

Click here to Subscribe to OvalShelf's YouTube Channel to get all our quick, precise and simple video recipes. YouTube subscription is FREE.
Commentaires